This is a guide on how to create and install custom voices for Freedom Force 1.
If you already have a voicepack and just want to install it, skip to "Modifying the Speech Index".
Each voice has a two-letter ID that MUST BE UNIQUE. Your voice ID can't be the same as any builtin ID's or any existing mods you have installed.
This thread lists all builtin voice ID's as well as many existing mod ID's. Pick an ID that isn't on the list of builtin ID's or any of the mods you currently have installed.
(if you plan on sharing/releasing the pack, you should pick an ID that isn't ANYWHERE on this list).
ID's can consist only of letters and numbers.
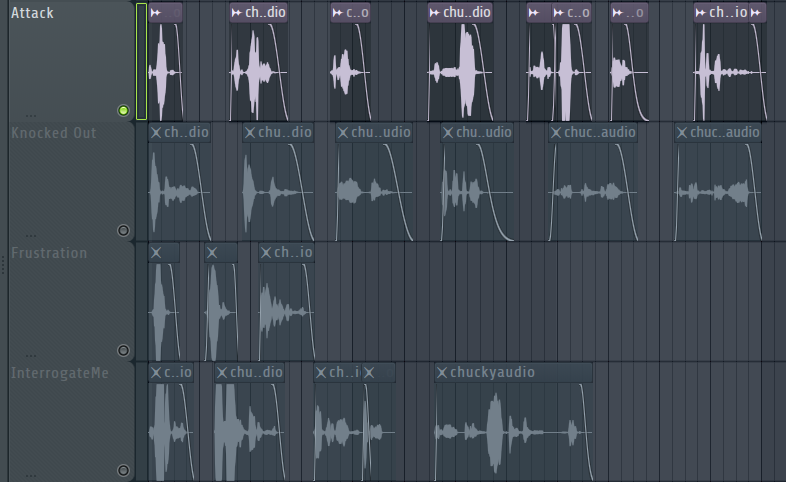
You'll need to record barks for various situations, sorted into categories. Multiple lines for each are recommended, with common actions like attacking, selecting and taking damage ideally wanting several different takes. The table of sounds for FF1 is listed below.
Note the spaces in "KNOCKED OUT" and "MAJOR PAIN" - they are intentional, the lines won't play without them.
ALSO note that both instances of "INTEROGATE" are spelt wrong. This is also necessary.
| Category |
Purpose |
| ALERT |
Entering combat - enemy spotted or going into battle |
| ATTACK1 |
Regular attack sound. Quick bark or grunt. |
| BLANK |
Mind is blank, has been brain-wiped |
| CANTINTEROGATE |
Trying to interrogate an enemy while still in combat or near other hostiles |
| DEFEND1 |
Guarding - taking a defensive stance, NOT the sound of actively being attacked |
| DODGE |
Evaded an oncoming attack |
| FLY |
Character has started flying |
| FRUSTRATION |
Can't carry out a given command (i.e. the player is asking to do something impossible) |
| FRUSTJUMP |
Can't get up to a given place (target location is too high to reach) |
| HYPNOSIS |
Character is being mind-controlled |
| INACTIVE |
Character has no orders and hasn't been used for a while |
| INTEROGATEME |
Character has surrendered and is ready to be interrogated |
| KNOCKED OUT |
Character has been fully KO'd (Health has reached 0) |
| MAJOR PAIN |
Being hit by any attack / taking any damage (Despite "major", this is the only pain sound) |
| PANIC |
Character has entered panicked state |
| RAGE |
Character has entered enraged state |
| SELECT |
Character has been selected (i.e. any time they're clicked on) |
Splitting the Takes
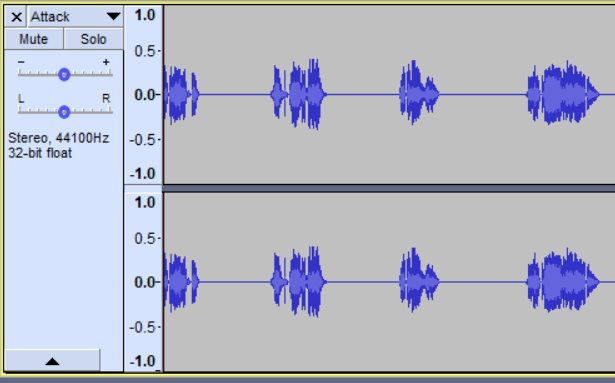
From here, drag a single category's audio into Audacity. Note that if it's in stereo, you'll need to merge it to mono by selecting "Split Stereo to Mono" and deleting one of the tracks:
 >
>

Leaving you with a single mono track like so:

From here, press CTRL+A to select the whole audio track (the grey background of the waveform should turn white) and go to "Effect" > "Normalize".
Normalize the file to -0.2db as shown.


Next, with the whole clip still selected, go to "Analyze" > "Silence Finder...", match the settings in the screenshot below and click "OK".


This will give you a label track marking the start of each take:

Note that there may be one extra label for any trailing silence at the end of the file. Delete this silence by highlighting it and hitting the "Del" key, and delete the label by clicking into the "S" textbox, erasing the "S" text and then pressing backspace one more time.


Next, go to "File" > "Export Multiple..." and make sure you match these settings.
Ensure the "Folder" is named to match your voice, the "Format" is set to "MP3 Files", "Force export to mono" is ticked (IMPORTANT!).
Also ensure "Include audio before first label" is ticked. The other settings will be remembered, but you have to check this box EVERY TIME.
After ensuring the output settings are correct, hit "Export". Just hit "OK" on each tag window as it comes up.

If you don't have the LAME encoder setup in Audacity, you may see this popup:

If you already have a LAME dll, direct it to the file. If you don't, you can get it from HERE.
Point it to your DLL and press "OK", and the exporting should continue with a success window.

The output folder should now contain all of the clips as MP3's, as shown:

Indexing the Speech Files
You now need to generate an index of your files, matching them to their category ID's. You can do this manually, or via an automation I'll provide next.
Either way, you need to end up with text like this:

Note that there is a SPACE at the start of each line (this is needed!). The format is "SPEECH_[ID]_[CAT]_[NUM]", with ID being your 2-digit ID, CAT being the filename category, and "NUM" just being the number of the take (note that this starts at 1 despite the files starting at 0. Adjust accordingly if you're doing this manually!)
If you have python installed (if not, you can install the latest version from here), you can easily automate this - either by yourself, or using my provided tool that you can grab from here. Here's a quick rundown on how to use it:
Extract the folder and run "_makespeech.bat" (if this doesn't work, try "_makespeech_P3.bat"). It'll ask you to select a folder, select the folder containing your MP3 files.

Next, it'll ask for your unique 2-character ID. Enter this. The tool will automatically make sure it doesn't conflict with any builtin IDs. Press "Enter" and the script will run.
(Note that while it'll correct common mistakes like "ATTACK" to "ATTACK1", unknown categories will be skipped)

This will place a text file at the top of the folder containing your indexed lines.

Modifying the Speech Index
Once you have a list of indexed files in the correct format, you need to navigate to "Data" > "Lang" > "English", open "speech.txt" and paste your new indexed lines at the bottom of the file and save it.
(Optionally, you can add a single empty line to help separate your modded voices. Just make sure there's no characters on this empty line.)

 Move your folder of MP3s into "Data" > "sounds" > "speech" > "english". Make sure this folder has the exact same name as shown in your indexed lines.

Next, open FFEdit.exe. Before doing anything else, make sure the data paths all point to your game's installation:

On the same tab, go down to the "Speech, Text and Languages" section and make sure "Output Directory" is set to the same folder as the "speech.txt" you modified earlier.
Now, click the "Generate Language Files" button. It'll ask you for three files in sequence: "speech.txt", "captions.txt", and "strings.txt". These are all in the same folder.


The program will be unresponsive for around 30 seconds. Don't click anything until you see the success popup:

Next, navigate to the "Characters" tab at the top and make sure "alchemiss" is selected on the left.
Change the name to the name of your voice, change "Speech ID" to your ID, make sure to untick "Campaign Only" (the voice won't show up if this is ticked).
Hit "Save" and your new character should now show up on the list to the left.


Close FFEdit. If you've done all of this correctly, the voice should now show up in the list of voices in-game!